


Peanut Butter Dog Treats (Soft & Crunchy)
Peanut butter dog treats are a classic favourite — and for good reason. The smell alone is usually enough to summon dogs from three rooms away. These treats are simple to make, highly rewarding, and perfect for everything from training sessions to everyday spoils. This recipe creates firm biscuits that can be baked softer or crunchier depending on your dog’s needs. Always use xylitol-free peanut butter, as xylitol is toxic to dogs.Why Dogs Love These Treats
- Strong peanut butter aroma dogs find irresistible
- Simple, recognisable ingredients
- Customisable texture for puppies, adults, and seniors
Ingredients
- 2½ cups whole wheat flour (or rice flour for sensitive dogs)
- 1 cup natural peanut butter (xylitol-free)
- 1 cup water
- 1 large egg
- 2 tablespoons honey (optional — omit for puppies under 12 months)
Instructions
- Preheat your oven to 175°C and line a baking tray with parchment paper.
- In a large bowl, combine the flour and egg.
- Add the peanut butter, water, and honey (if using), then mix until a stiff dough forms.
- Roll the dough out to about 1–1.5 cm thick on a lightly floured surface.
- Cut into shapes or small squares and place on the prepared baking tray.
- Bake for 18–20 minutes until lightly golden.
- Allow to cool completely before serving.
Texture Adjustments
- Softer treats: Bake for the shorter time and roll dough slightly thicker.
- Crunchier treats: Bake a few minutes longer or leave in the oven with the door ajar as it cools.
Puppy, Adult & Senior Feeding Notes
- Puppies: Cut treats very small and bake softer. Avoid honey under 12 months.
- Adult dogs: Suitable as-is, adjust size based on activity level.
- Senior dogs: Bake softer and reduce portion size to protect teeth.
Training Treat Sizing
For training, cut treats into pea-sized pieces. Small treats allow frequent rewards without excessive calorie intake.Storage & Shelf Life
- Store in an airtight container in the fridge for up to 3–4 weeks
- Freeze for up to 6–8 months
- Discard if treats smell off or show mould
Printable Recipe Card
- Prep time: 10 minutes
- Bake time: 18–20 minutes
- Oven temperature: 175°C
- Yield: ±24 medium treats
- Best for: Training rewards & everyday treats

Banana, Peanut Butter & Oat Dog Treats
These banana, peanut butter and oat dog treats are a go-to favourite for pet owners who want something quick, nutritious, and wildly popular with dogs. They’re naturally sweetened, easy to digest, and perfect for everyday rewards. The banana provides natural sweetness and potassium, oats add gentle fibre, and peanut butter delivers flavour and healthy fats. As always, use only xylitol-free peanut butter.Why These Treats Work So Well
- Soft texture ideal for puppies and senior dogs
- Minimal ingredients with clear nutritional purpose
- Easy to size down for training rewards
Ingredients
- 2 ripe bananas, mashed
- 1/2 cup natural peanut butter (xylitol-free)
- 2 cups rolled oats (or oat flour for smoother texture)
Instructions
- Preheat oven to 150°C and line a baking tray with parchment paper.
- If using whole oats, blend them into a coarse flour for a softer treat.
- In a bowl, mash the bananas until smooth.
- Add peanut butter and oats, mixing until a thick dough forms.
- Roll dough out to about 1 cm thick and cut into small shapes, or roll into bite-sized balls.
- Place treats on the baking tray and bake for 25–30 minutes.
- Allow to cool fully — treats will firm up as they cool.
Texture Adjustments
- Softer treats: Bake closer to 25 minutes and use oat flour.
- Crunchier treats: Bake longer and allow to cool in the oven with the door slightly open.
Puppy, Adult & Senior Feeding Notes
- Puppies: Break treats into very small pieces. Soft texture is ideal for teething mouths.
- Adult dogs: Suitable as-is, adjust size based on dog size and activity level.
- Senior dogs: Use oat flour and bake softer to protect ageing teeth.
Training Treat Sizing
For training, cut treats into pea-sized pieces. The mild sweetness makes them motivating without being overwhelming.Storage & Shelf Life
- Store in an airtight container for up to 7 days
- Refrigerate for up to 14 days
- Freeze for up to 3 months
Printable Recipe Card
- Prep time: 10 minutes
- Bake time: 25–30 minutes
- Oven temperature: 150°C
- Yield: ±30 small treats
- Best for: Training treats, puppies, senior dogs

Pumpkin & Oat Digestive Dog Treats
These pumpkin and oat dog treats are designed for everyday wellness and gentle digestion support. Pumpkin dog treats are widely recommended for digestive health due to pumpkin’s natural soluble fibre, while oats provide slow-release energy that’s easy on sensitive stomachs. Homemade pumpkin dog treats are especially useful after diet changes, for dogs prone to mild tummy upsets, or for owners who prefer treats with a clear nutritional purpose — always fed as treats, not meals.Why Pumpkin & Oats Work Well Together
- Pumpkin adds soluble fibre that supports normal digestion
- Oats are gentle, filling, and easy to digest
- Lower fat profile compared to many commercial treats
Ingredients
- 1 cup plain pumpkin purée (no sugar or spices)
- 2 cups rolled oats (or oat flour for softer treats)
- 1 egg
- 1–2 tablespoons water (only if needed)
Instructions
- Preheat oven to 160°C and line a baking tray with parchment paper.
- If using rolled oats, blend into a coarse flour for smoother texture.
- In a bowl, mix pumpkin purée and egg until smooth.
- Add oats gradually, mixing until a firm dough forms.
- If dough feels dry, add water one tablespoon at a time.
- Roll out to about 1 cm thickness and cut into small shapes.
- Bake for 25–30 minutes until set but not over-browned.
- Allow to cool fully before serving.
Texture & Digestibility Tips
- Softer treats: Use oat flour and bake closer to 25 minutes.
- Crunchier treats: Bake longer and allow to cool in the oven.
Puppy vs Adult vs Senior Feeding Notes
- Puppies: Break into very small pieces; excellent for gentle training rewards.
- Adult dogs: Suitable as-is, adjust portion size based on dog size.
- Senior dogs: Keep texture soft to protect ageing teeth.
Training Treat Sizing
For training sessions, cut treats into pea-sized cubes. Pumpkin’s mild flavour keeps dogs engaged without overstimulation, making these treats ideal for longer training sessions.Storage & Shelf Life
- Airtight container: up to 7 days
- Refrigerated: up to 14 days
- Frozen: up to 3 months
Printable Recipe Card
- Prep time: 10 minutes
- Bake time: 25–30 minutes
- Oven temperature: 160°C
- Yield: ±30 small treats
- Best for: Sensitive tummies, training treats, daily rewards

Blueberry & Yoghurt Frozen Pupsicles
Frozen dog treats are one of the simplest and most effective ways to help dogs cool down on hot days. These blueberry and yoghurt frozen pupsicles are refreshing, gentle on digestion, and easy to portion — making them ideal for summer afternoons, post-walk cooldowns, or calm indoor enrichment. Blueberries add natural antioxidants and flavour, while plain yoghurt provides creaminess and a cooling texture. The result is a light, hydrating frozen dog treat rather than a calorie-heavy snack.Why Frozen Treats Work So Well
- Help regulate body temperature during warm weather
- Encourage hydration in dogs who drink less water
- Slow consumption supports calm, enrichment-style licking
Ingredients
- 1 cup plain yoghurt (unsweetened, no xylitol)
- ½ cup fresh or frozen blueberries
- 2–3 tablespoons water (optional, for thinner consistency)
Instructions
- Add yoghurt and blueberries to a blender.
- Blend until smooth, adding water if needed for a pourable texture.
- Pour mixture into silicone moulds, ice cube trays, or paw/bone moulds.
- Freeze for at least 4 hours, or until fully set.
- Remove pupsicles from moulds and serve immediately or store frozen.
Puppy vs Adult vs Senior Cooling Guide
- Puppies: Offer very small pupsicles or partially thawed pieces. Limit to short licking sessions to avoid sensitive tummies.
- Adult dogs: One small pupsicle after walks or outdoor play supports cooling and hydration.
- Senior dogs: Allow pupsicles to soften slightly before serving to reduce tooth sensitivity.
Portion & Treat Frequency
Frozen treats should complement, not replace, regular meals. One small pupsicle is sufficient for most dogs. For smaller breeds, break into halves or thirds to avoid excess dairy intake.Training & Enrichment Use
Frozen pupsicles are best used as calm enrichment rewards rather than active training treats. They work especially well after grooming, crate rest, or relaxed indoor activities.Storage & Safety Notes
- Store frozen pupsicles in an airtight container for up to 2 months
- Always supervise your dog while licking frozen treats
- Avoid sweetened yoghurt or flavoured dairy products
Printable Frozen Treat Card
- Prep time: 5 minutes
- Freeze time: 4 hours
- No baking required
- Yield: ±12 small pupsicles
- Best for: Hot weather, hydration support, calm enrichment

Apple & Cinnamon Oat Dog Treats
These apple and cinnamon oat dog treats are lightly sweet, gently aromatic, and perfect for dogs who enjoy a bit of crunch without heavy fats or added sugars. They’re a great everyday option for pet owners who want something wholesome, familiar, and easy to digest. Apple provides natural fibre and mild sweetness, oats support steady energy release, and a small pinch of cinnamon adds aroma without overwhelming sensitive noses. Think of these as the “tea biscuit” of the dog world — comforting, not flashy.Why Apple & Oats Are a Smart Combo
- Apples add natural fibre and moisture
- Oats are gentle on digestion and filling
- Low-fat, low-sugar profile compared to commercial treats
Ingredients
- 1 cup finely grated apple (peeled, core removed)
- 2 cups rolled oats (or oat flour for smoother texture)
- 1 egg
- 1 tablespoon coconut oil (optional)
- 1/4 teaspoon ground cinnamon
Instructions
- Preheat oven to 160°C and line a baking tray with parchment paper.
- If using whole oats, blend into a coarse flour.
- In a bowl, mix grated apple, egg, coconut oil, and cinnamon.
- Add oats gradually, mixing until a workable dough forms.
- Roll dough out to about 1 cm thick and cut into small shapes.
- Place on baking tray and bake for 25–30 minutes.
- Cool completely before serving — treats firm up as they cool.
Texture & Baking Tips
- Softer treats: Use oat flour and bake closer to 25 minutes.
- Crunchier treats: Bake longer and allow to cool in the oven.
Puppy vs Adult vs Senior Feeding Notes
- Puppies: Break into very small pieces; ideal as gentle training rewards.
- Adult dogs: Suitable as-is; adjust size based on dog size and activity.
- Senior dogs: Use oat flour and bake softer to protect ageing teeth.
Training Treat Sizing
For training, cut treats into pea-sized cubes. The mild apple aroma keeps dogs engaged without overstimulation, making these ideal for longer sessions.Storage & Shelf Life
- Airtight container: up to 7 days
- Refrigerated: up to 14 days
- Frozen: up to 3 months
Printable Recipe Card
- Prep time: 10 minutes
- Bake time: 25–30 minutes
- Oven temperature: 160°C
- Yield: ±30 small treats
- Best for: Daily rewards, training treats, sensitive eaters
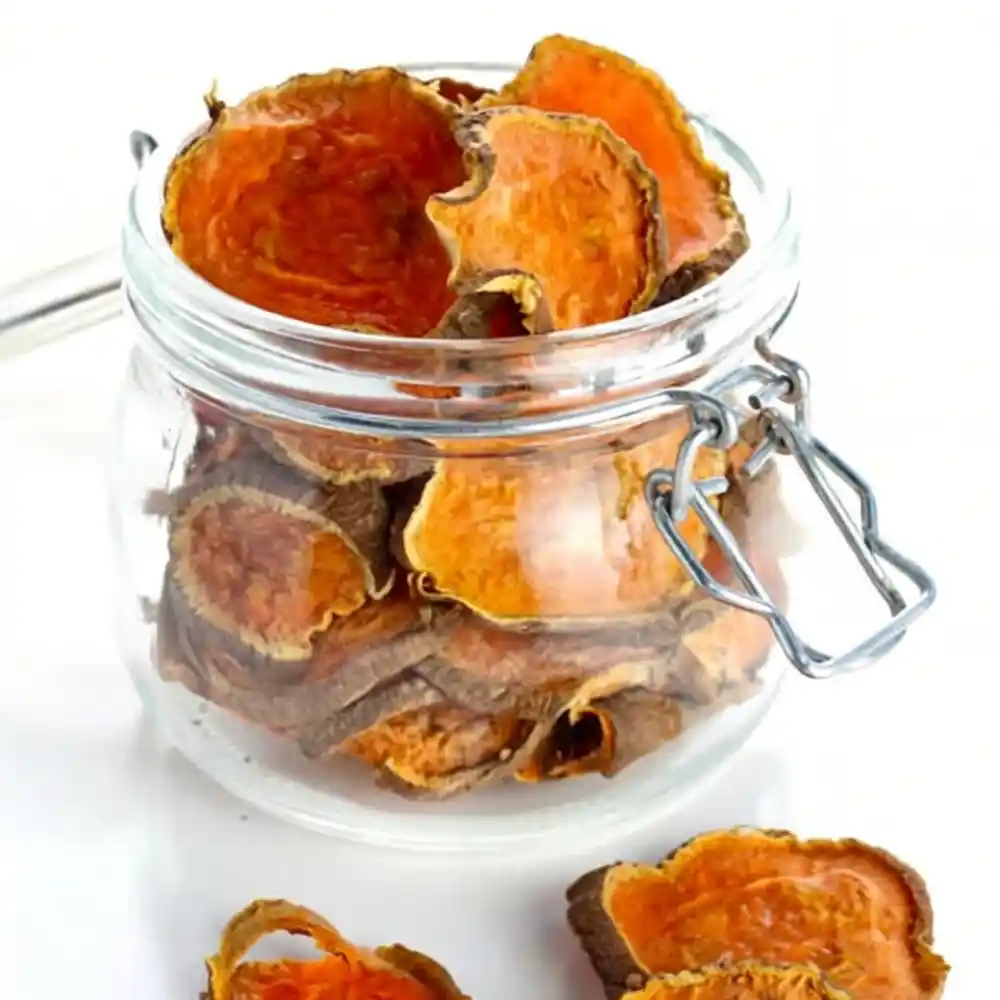
Sweet Potato Oven-Dried Chew-Style Dog Treats
Sweet potato oven-dried chew-style treats are a popular homemade alternative to commercial dog chews. By slowly drying sweet potato slices in a low-temperature oven, you create a firm, satisfying chew using a single, clearly identifiable ingredient. These treats are oven-dried, not dehydrated with specialised equipment, making them accessible for home kitchens while still achieving a long-lasting chew texture.Why Oven-Drying Sweet Potato Works
- Low-heat oven drying removes moisture slowly without burning
- Creates a naturally firm chew without additives
- Single-ingredient treat suitable for sensitive eaters
Ingredients
- 2–3 large sweet potatoes
Instructions (Oven-Dried Method)
- Preheat oven to 120°C (fan-assisted if available).
- Wash and scrub sweet potatoes thoroughly. Peeling is optional.
- Slice lengthwise into strips approximately 1 cm thick.
- Arrange slices in a single layer on baking racks or lined trays.
- Place trays in the oven and oven-dry for 2½–3 hours.
- Turn slices halfway through to ensure even drying.
- For firmer chews, switch off the oven and leave slices inside with the door slightly open for an additional 30–60 minutes.
- Allow to cool completely before serving.
Oven-Drying Texture Guide
- Softer chews: Thicker slices and shorter oven-drying time.
- Firm chews: Thinner slices and longer oven-drying time.
Puppy vs Adult vs Senior Chewing Guide
- Puppies: Offer thin, lightly oven-dried slices under supervision.
- Adult dogs: Standard oven-dried strips provide longer chewing time.
- Senior dogs: Use thicker slices dried for less time to reduce hardness.
Training & Enrichment Use
Oven-dried sweet potato chews are best used as calm enrichment treats, not quick training rewards. They’re ideal after walks, during crate time, or when dogs need a settling activity.Storage & Shelf Life
- Airtight container (room temperature): up to 2 weeks
- Refrigerated: up to 4 weeks
- Frozen: up to 6 months
Printable Treat Card
- Prep time: 10 minutes
- Oven-drying time: 2½–4 hours
- Oven temperature: 120°C
- Yield: ±20 oven-dried chew strips
- Best for: Calm chewing, boredom relief, single-ingredient diets

Chicken & Sweet Potato Oven-Baked Training Bites
These chicken and sweet potato training bites are designed for high-value motivation without heaviness. They’re oven-baked at low heat, naturally aromatic, and easy to size down — perfect for repetition during training without overfeeding. Lean chicken provides flavour dogs love, while sweet potato adds gentle fibre and structure so the bites hold together without fillers.Why This Combo Works for Training
- Oven-baked for food safety and consistent texture
- High aroma, low fat — motivating without being messy
- Easy to cut into pea-sized rewards
Ingredients
- 1 cup cooked chicken breast, finely shredded (plain, no seasoning)
- 1 cup mashed sweet potato (plain)
- 1 egg
- 1–2 tablespoons oat flour (optional, for firmness)
Instructions (Oven-Baked Method)
- Preheat oven to 160°C and line a baking tray with parchment paper.
- Combine shredded chicken, mashed sweet potato, and egg in a bowl.
- Add oat flour if needed to form a soft, workable dough.
- Press dough into a thin sheet (about 8–10 mm thick).
- Bake for 18–22 minutes until set but still soft.
- Cool completely, then cut into pea-sized cubes.
Texture Control (Training-Friendly)
- Softer bites: Shorter bake time, no added flour.
- Firmer bites: Add oat flour and bake a few minutes longer.
Puppy vs Adult vs Senior Training Guide
- Puppies: Very small, soft cubes; ideal for short sessions.
- Adult dogs: Standard pea-sized bites for repetition.
- Senior dogs: Keep texture soft; smaller portions protect teeth.
Training Portion Guidance
Use multiple tiny rewards rather than fewer large ones. These bites are designed for frequency, not fullness.Storage & Shelf Life
- Refrigerated (airtight): up to 5 days
- Frozen: up to 3 months (thaw before use)
Printable Recipe Card
- Prep time: 10 minutes
- Oven-bake time: 18–22 minutes
- Oven temperature: 160°C
- Yield: ±150 pea-sized training bites
- Best for: Training sessions, recall work, puppy classes

Carrot & Rice Dog Treat Balls
These carrot and rice dog treat balls are a gentle, everyday option for dogs who prefer softer textures or do better on simpler ingredients. They’re lightly aromatic, easy to digest, and naturally hold their shape without oats or added binders. Cooked rice provides mild energy and structure, while carrots add moisture, colour, and a subtle sweetness that dogs enjoy. Think of these as the calm, dependable treat — not flashy, just quietly effective.Why Carrot & Rice Work So Well
- Rice is gentle on digestion and easy to tolerate
- Carrots add natural fibre and moisture
- Soft texture ideal for training, puppies, and seniors
Ingredients
- 1 cup cooked white rice (plain, cooled)
- 1 cup finely grated carrot (lightly steamed)
- 1 egg
- 1 tablespoon olive oil or coconut oil (optional)
Instructions (Oven-Baked)
- Preheat oven to 160°C and line a baking tray with parchment paper.
- In a bowl, combine cooked rice and grated carrot.
- Add the egg and oil (if using) and mix until evenly combined.
- Roll mixture into small balls, about the size of a marble or grape.
- Place balls evenly spaced on the baking tray.
- Bake for 20–25 minutes until set but still soft inside.
- Allow to cool completely before serving.
Texture & Baking Tips
- Softer balls: Bake closer to 20 minutes.
- Firmer balls: Bake slightly longer and allow to cool in the oven.
Puppy vs Adult vs Senior Feeding Guide
- Puppies: Break balls in half; ideal for short training sessions.
- Adult dogs: Suitable as-is for daily rewards.
- Senior dogs: Keep texture soft to protect ageing teeth.
Training Treat Sizing
For training, cut or tear balls into pea-sized pieces. Their mild aroma keeps dogs engaged without overstimulation, making them ideal for longer sessions.Storage & Shelf Life
- Refrigerated (airtight): up to 5 days
- Frozen: up to 3 months
- Thaw fully before serving
Printable Recipe Card
- Prep time: 10 minutes
- Bake time: 20–25 minutes
- Oven temperature: 160°C
- Yield: ±30 small treat balls
- Best for: Training rewards, gentle diets, puppies & seniors

Grain-Free Carrot & Sweet Potato Button Dog Treats
These grain-free carrot and sweet potato button dog treats are soft-baked, vegetable-based snacks made without any grains, flours, rice, or oats. Each treat is gently pressed in the centre to create a neat button shape that bakes evenly and stays soft inside. Sweet potato provides natural structure and slow-release energy, while carrot adds moisture, fibre, and a subtle sweetness dogs naturally enjoy. The result is a simple, honest treat that looks homemade and smells inviting — no fillers, no shortcuts.Why This Recipe Is Truly Grain-Free
- No rice, oats, wheat, corn, or grain-derived flours
- Vegetable-based binding instead of cereals
- Clear ingredient list that’s easy to recognise
Ingredients
- 1 cup mashed sweet potato (plain, cooked)
- 1 cup finely grated carrot (lightly steamed)
- 1 egg
- 1 tablespoon coconut oil or olive oil (optional)
Instructions (Oven-Baked)
- Preheat oven to 160°C and line a baking tray with parchment paper.
- In a bowl, combine mashed sweet potato and grated carrot.
- Add the egg and oil (if using) and mix until fully combined.
- Roll mixture into small balls, about marble-sized.
- Place balls evenly spaced on the tray.
- Using your thumb, gently press the centre of each ball to form a shallow indentation.
- Bake for 18–22 minutes until set but still soft inside.
- Allow to cool completely before serving.
Puppy vs Adult vs Senior Guide
- Puppies: Bake on the softer side and break buttons into smaller pieces.
- Adult dogs: Serve whole as training or everyday rewards.
- Senior dogs: Slightly reduce bake time for easier chewing.
Training Treat Sizing
The indented button shape makes these treats easy to split. For training, break into pea-sized pieces to reward frequently without overfeeding.Storage & Shelf Life
- Refrigerated (airtight): up to 5 days
- Frozen: up to 3 months
- Thaw fully before serving
Printable Recipe Card
- Prep time: 10 minutes
- Bake time: 18–22 minutes
- Oven temperature: 160°C
- Yield: ±25 button treats
- Diet type: Grain-Free
- Best for: Training, sensitive digestion, everyday rewards
Grain-Free Dog Treat Options
Grain-free dog treats replace wheat, oats, or rice with vegetable-based ingredients such as sweet potato, carrot, or pumpkin. These options are useful for dogs with specific sensitivities or owners who prefer minimal ingredient lists. Grain-free treats are not automatically healthier for every dog, but they can be helpful when guided by your dog’s individual tolerance and nutritional needs.
-
Cuthbert’s Bbq & Rib Biscuit 300g
R39,64 — or subscribe to save 10% -
Wild Training Bits Rosemary Adult Dog Treats 8 X 113g
R350 — or subscribe to save 10% -
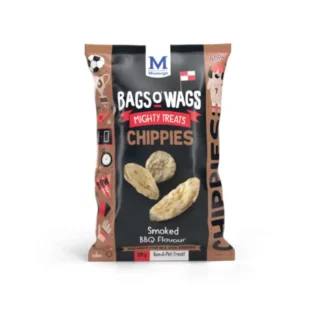
Chippies Smoked Bbq Adult Dog Treats 24 X 28g
R220 — or subscribe to save 10% -
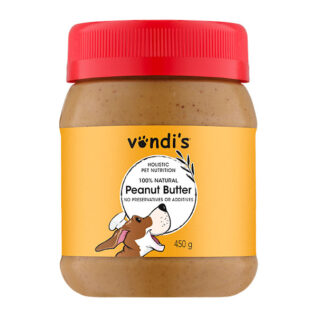
Natural Peanut Butter for Dogs – 450g
R94 — or subscribe to save 10% -
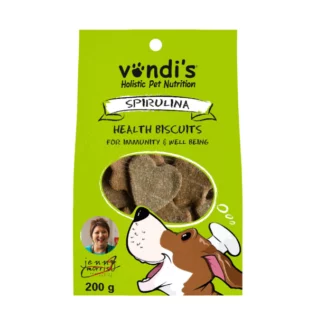
Jenny Morris Spirulina Biscuits – 200g
R58 — or subscribe to save 10% -
Jenny Morris Peanut Butter & Pumpkin Biscuits 200g
R63 — or subscribe to save 10% -
Vondis Peanut Butter & Pumpkin Biscuits 400g
R98 — or subscribe to save 10% -
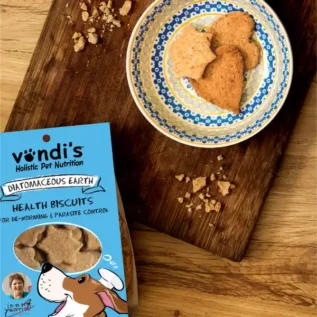
Jenny Morris Diatomaceous Biscuits – 450g
R98 — or subscribe to save 10%






One Comment